Beginners tutorial -How to start a Shopify store
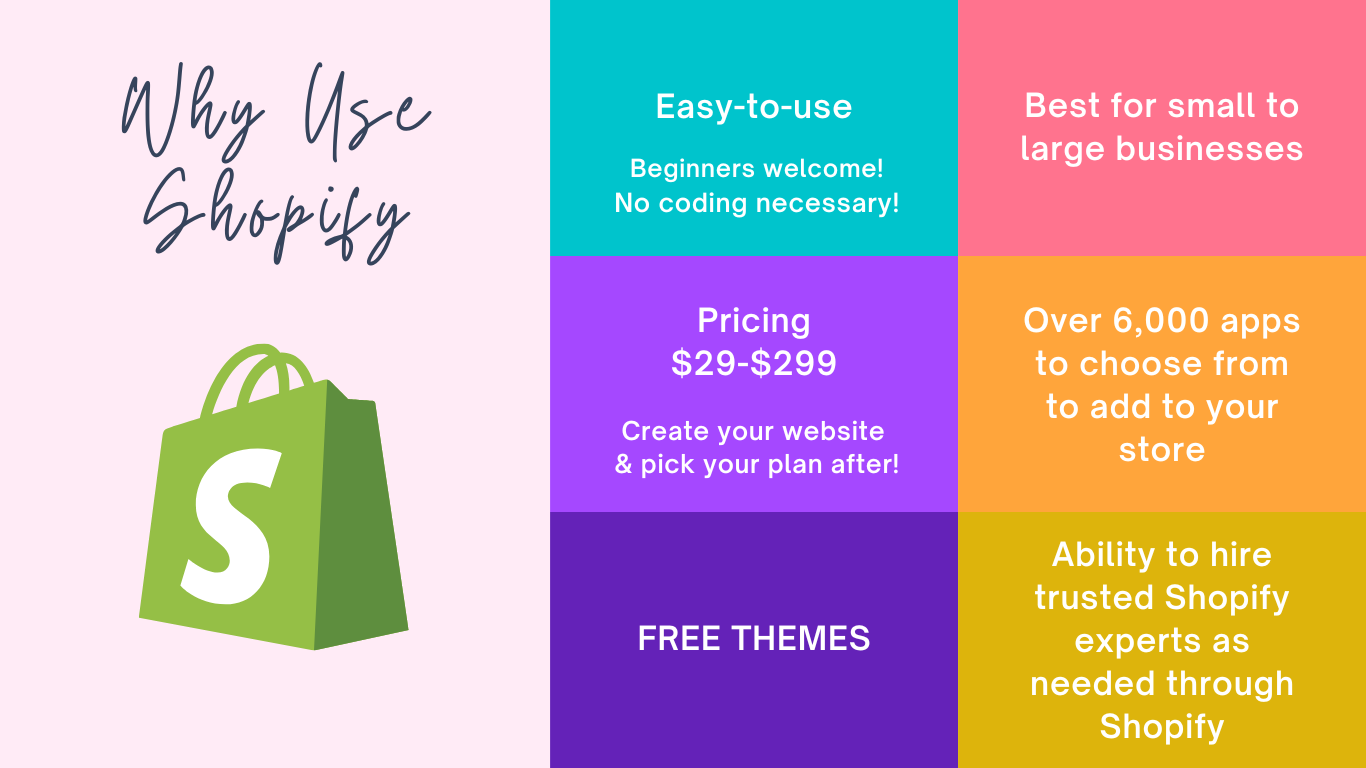
Shopify is hands down the go to e-commerce platform for launching your online business. Whether that be a dropshipping business, selling items in your own warehouse or home, a digital project, affiliate program - Shopify is the way to go. In this blog post, I will break down why over 4 million users have their store on Shopify. Here are a few big names, you might recognize: Haley Beiber’s Rhode Skin, Fashion Nova, Gym Shark, All Birds, Kylie Cosmetics, and even my own six-figure e-commerce site.
Here is what I will cover in the tutorial:
Why is Shopify the best e-commerce platform?
How do I sign-up?
What template should I select?
What apps do I need?
It may seem like a lot to cover, but Shopify makes it VERY easy to set up your own shop. If you’ve tried building your own site on Wordpress for example, you will be pleasantly surprised how easy this process is. Bonus, there is little, to no code needed to launch your store!
So what exactly is Shopify and why is it the best option for my online shop
As of 2022, Shopify is still the gold standard of choice for e-commerce platforms. It’s user-friendly for beginners and people who do not have experience designing or coding. It enables you to sell products directly on your website AND across multiple marketplaces (Amazon, Walmart etc) and Social Media. It brings your sales ALL back to one place, your website within Shopify.
How to start a Shopify store. Begin here!
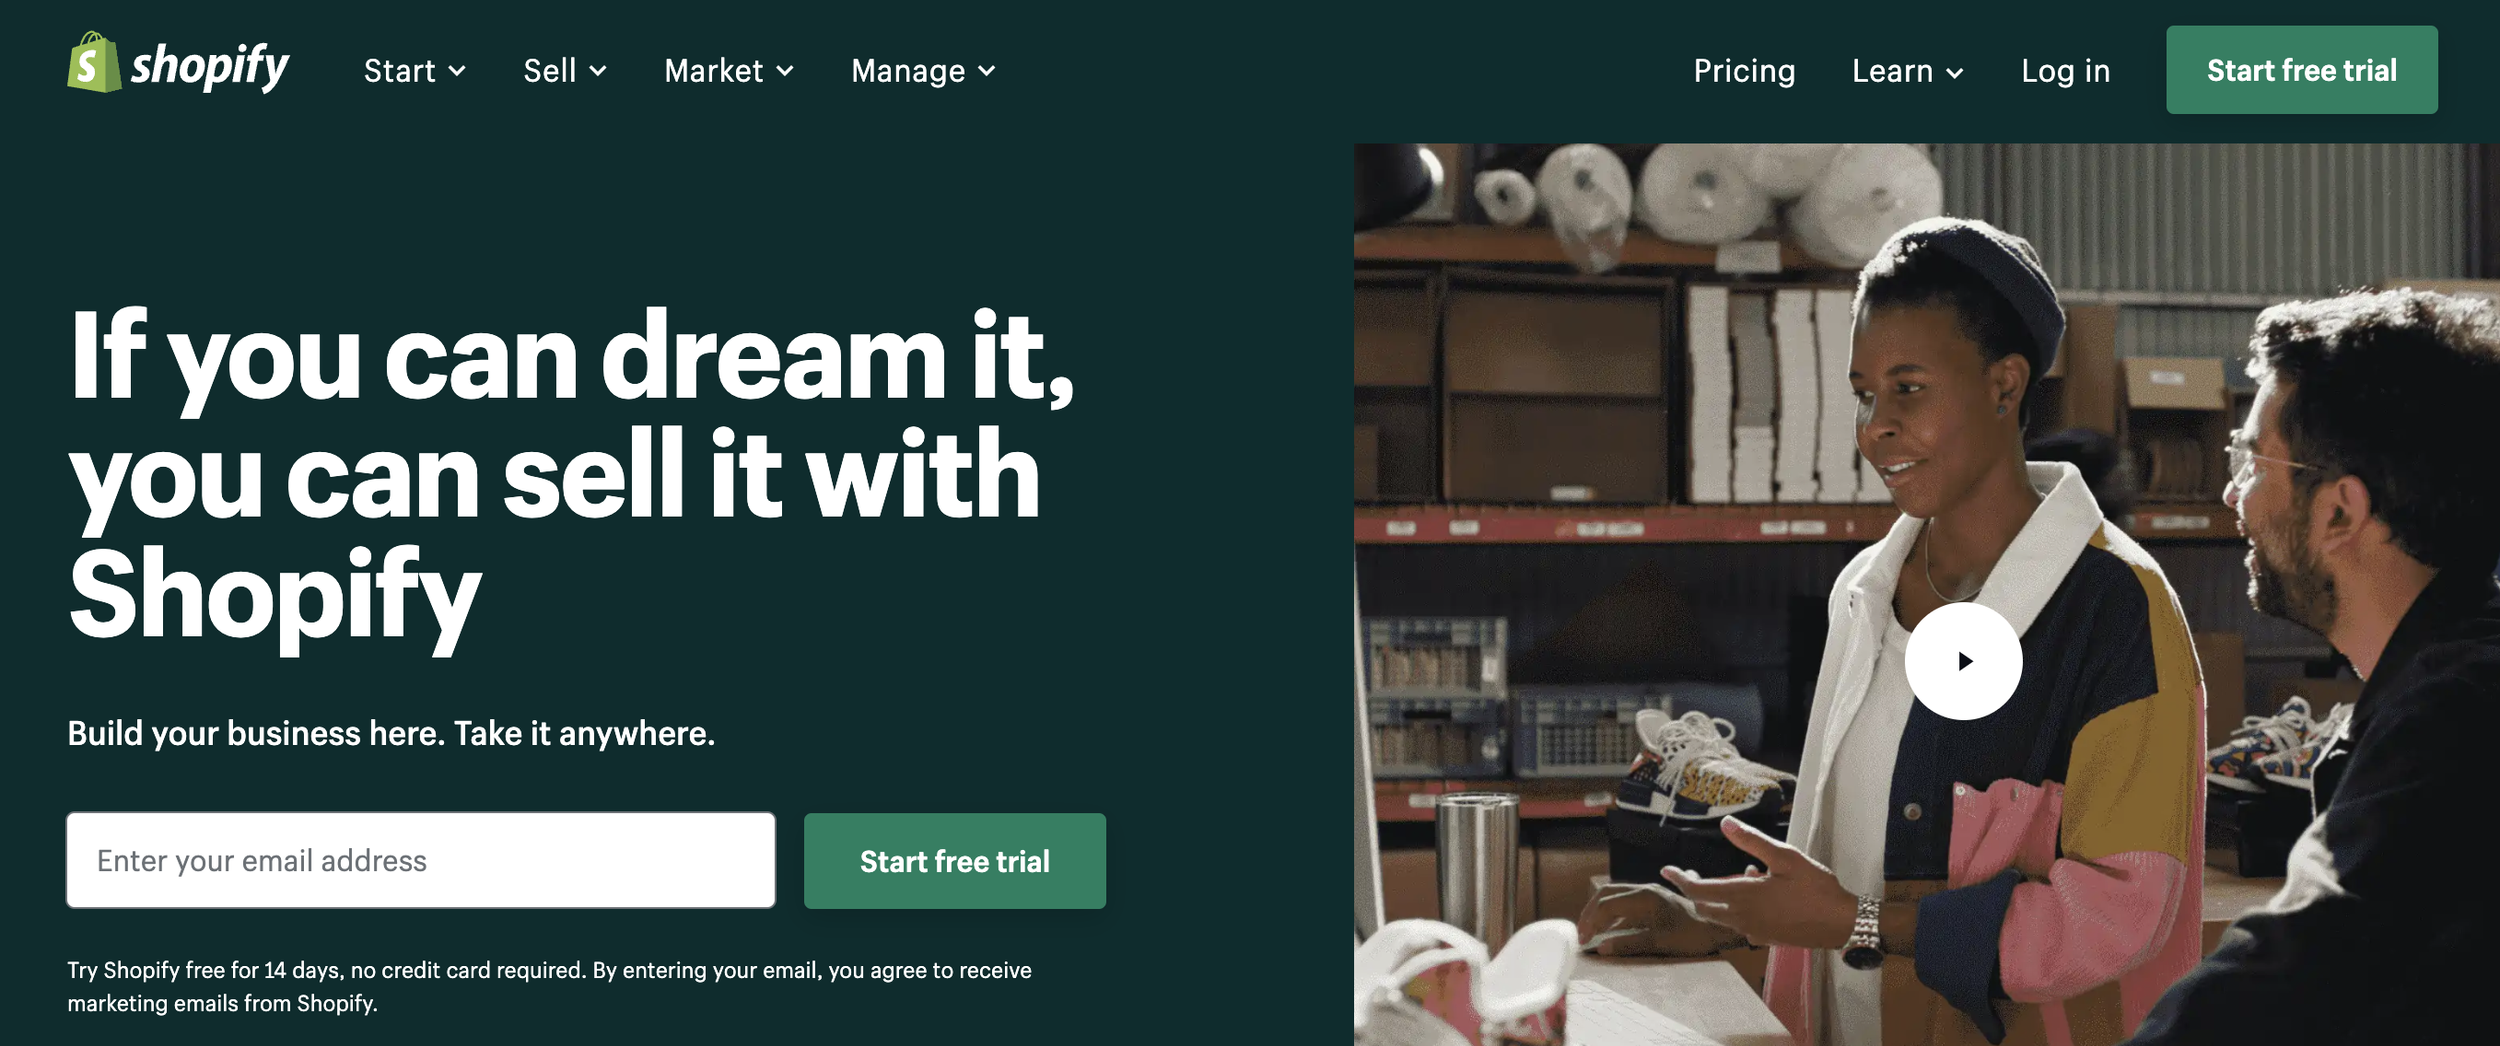
Let’s go to the Shopify website using this link here and claim their 14 day free trial. (This gives you enough time to set up your store or get ready to launch and make sales!)
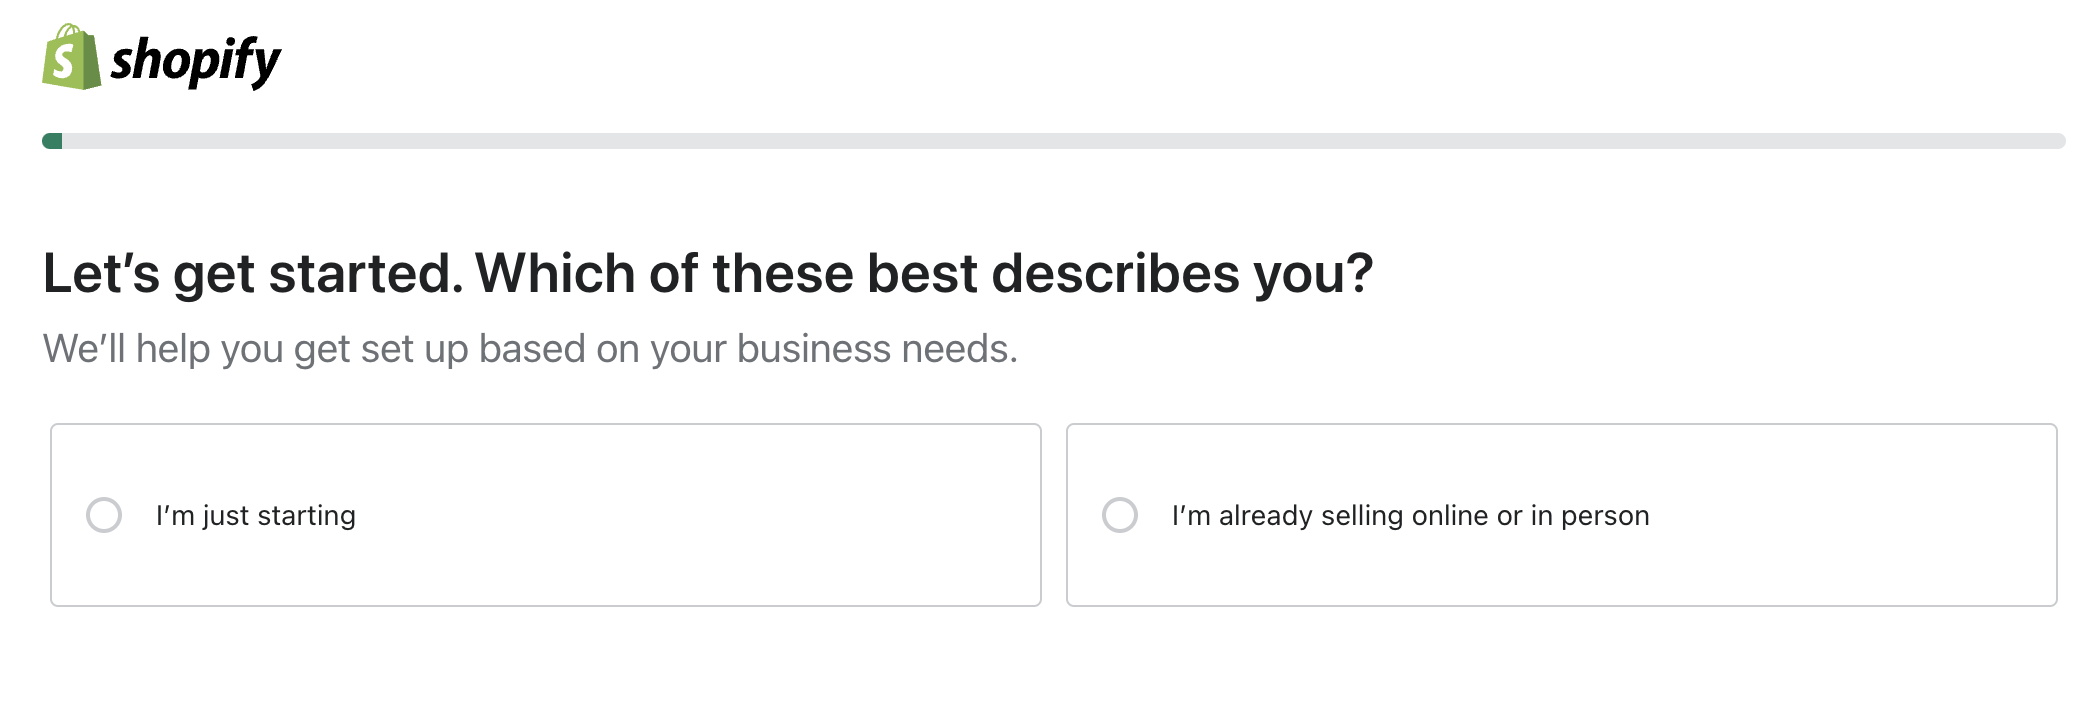
Follow the prompts in Shopify based on your needs.
Are you just starting out? Or do you currently make something on your Cricut and are ready to sell it?
Select the prompt that makes the most sense for your situation. See example image below.
For this beginners guide, I have selected “I’m already selling online or in person”.
After you make your selection you will be directed to this page below.
Shopify really makes it this easy. You can work in this order and click on each item as you go.
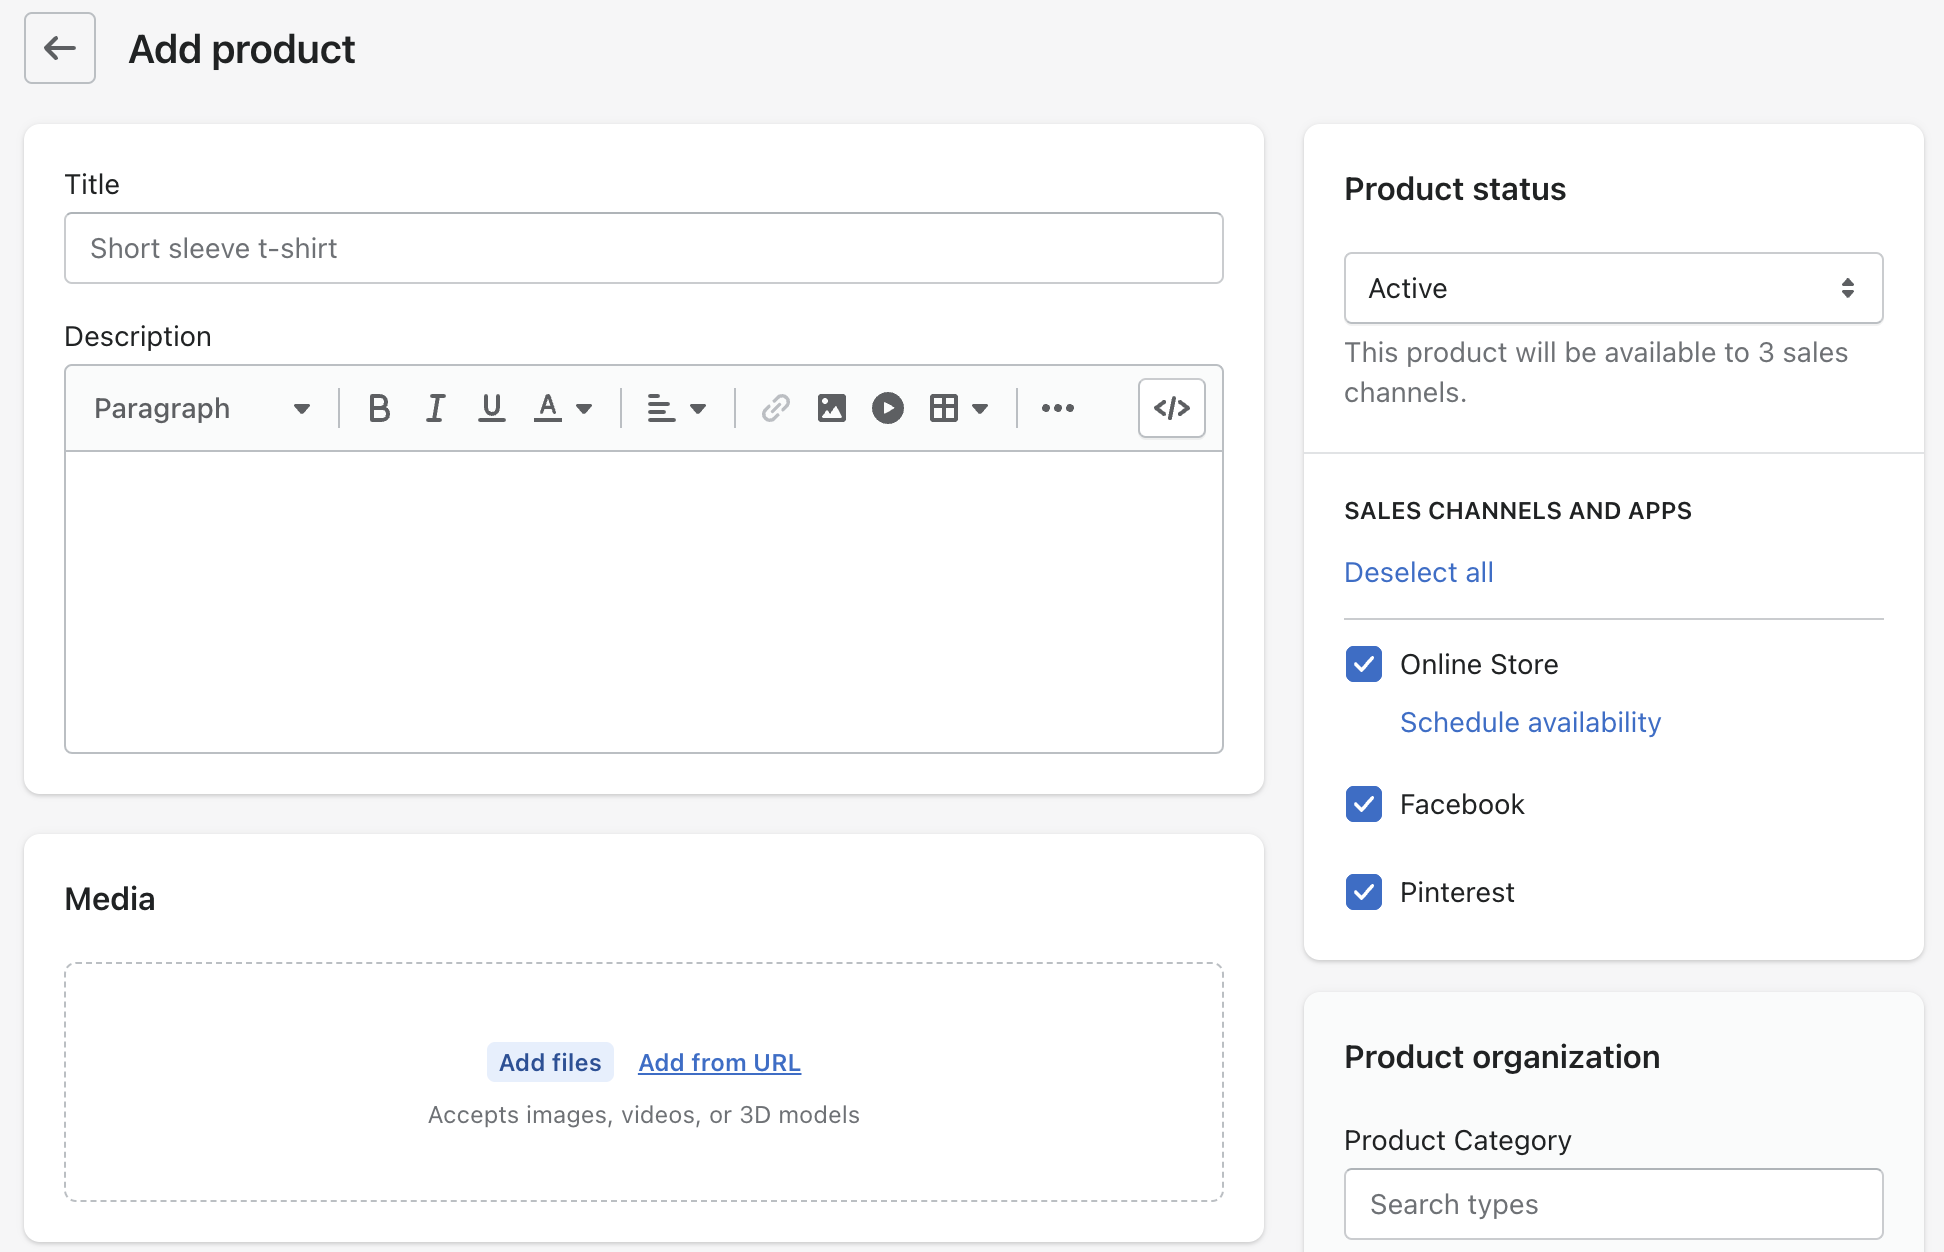
Lets start with Step 1: Add your first product
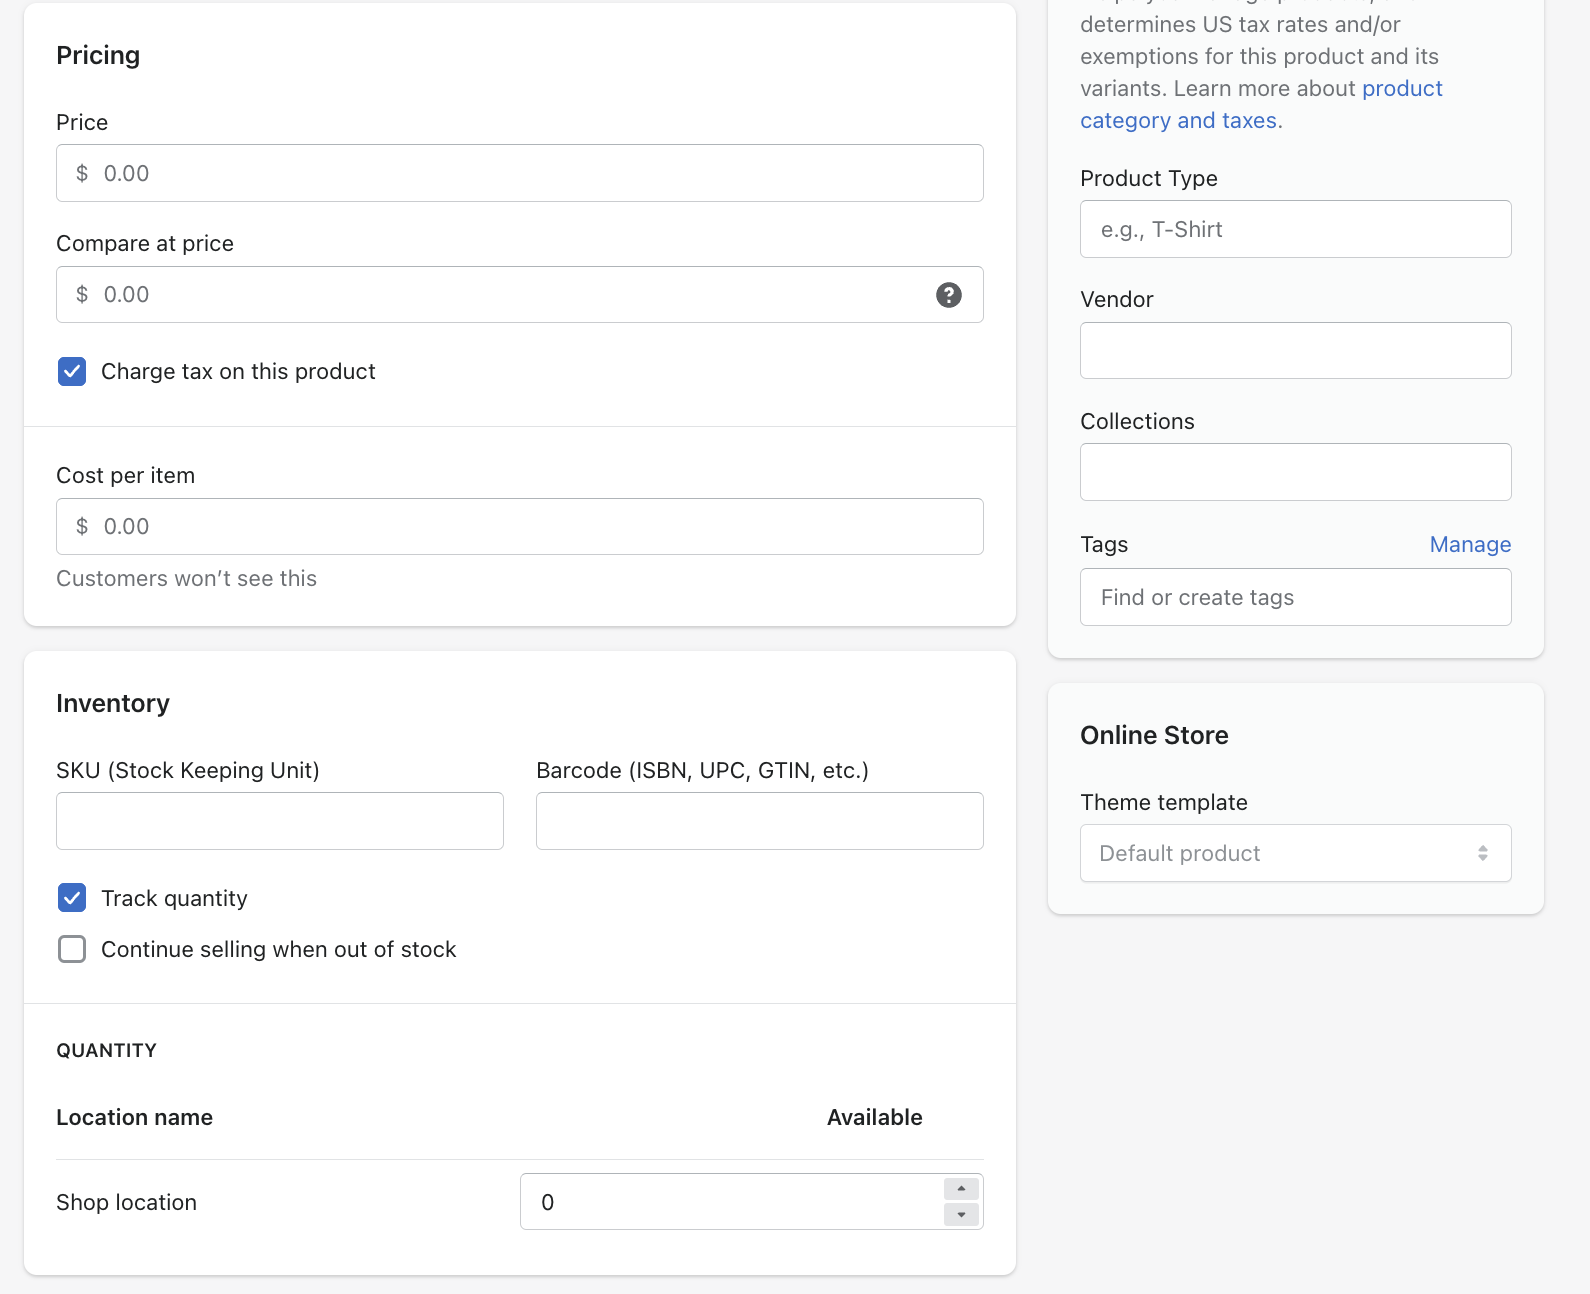
Step One: It's time to add products to your store. These can be physical items, digital downloads, services, or anything else you dream up.
Be sure to give your product a clear Title and Product Description.
Here are some tips for your Listing Description: Keep it a short sweet paragraph - focusing on benefits, who it’s for, what makes it special, & why they need it. Bullet point going over the features. Use language based on your target audience.
Add your “Media” aka product photos or videos. Ideal # of photos is 3. Shopify typically recommends using 2048 x 2048 px for square product photos.
Give your product a listing price and include your cost per item (your customer won’t see this, however, you will accurately be able to track your expenses).
Do you have a certain # of products to sell, then don’t forget to track the quantity.
Check the box for “continue selling when out of stock” if you:
have products available for pre-order, unlimited # of items to sell (digital item),
You have stock coming soon and you want to continue selling before it arrives.
You want to sell first and then order supplies later.
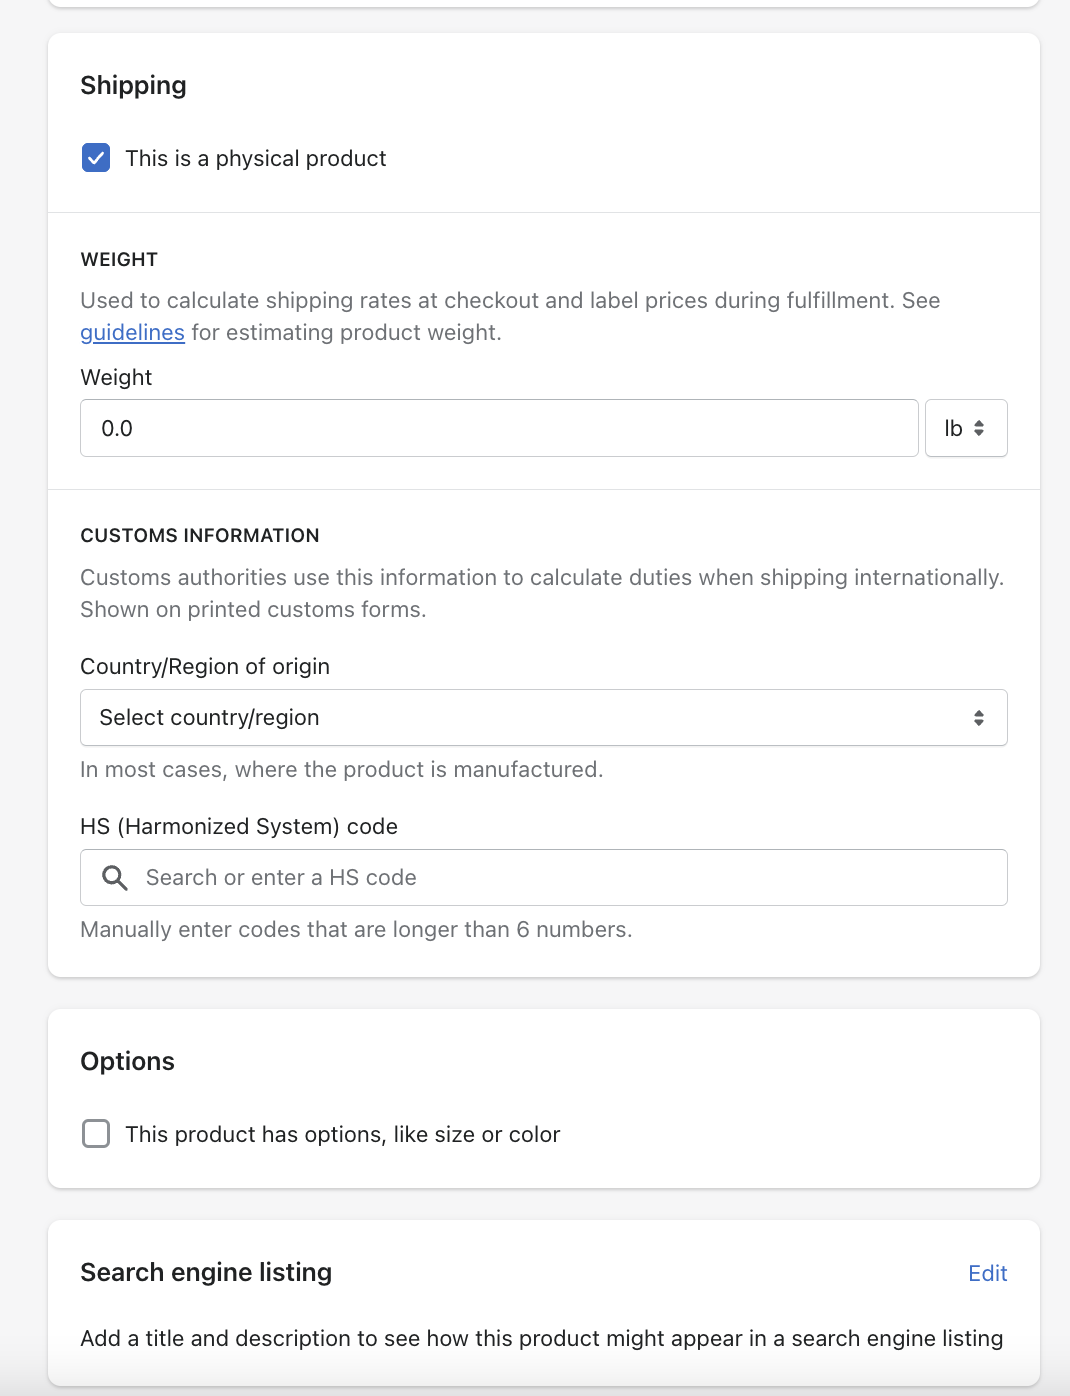
Add the exact product weight (this will help calculate the shipping cost).
Are you shipping internationally? Then fill out the next section. Not sure? Leave it blank for now.
Options
This is great if you have different product options. For example different size t-shirts, different color products.
Search engine listing
Add a clear concise product title and description using keywords about the product you are selling.
(I will go into detail below about “SEO” in another blog post.)
Select Save in the upper right corner and your listing has been added! Repeat this as needed.
Step 2: “Customize the Theme”. Think of the theme as the “look, design, or feel” of your store.
Scroll to the bottom of the HOME page and search from “Free Templates”. Select a design that fits the style you are going for. If you can’t find one you love, you can also purchase a Template. Remember the templates are customizable, you can change the font, color, photos.
IMPORTANT NOTE: Once you have selected a theme that you are ready to use. Hit the “Actions” button and scroll down to select Duplicate. Think of this as a safety feature, if you make a mistake you can always get back to before you began working on your store. You can make a duplicate every time you are working on adding something new to your store.
Now scroll to the bottom of your HOME screen and you will see the copy of your store you made. It is now time to get designing! Hit Customize.
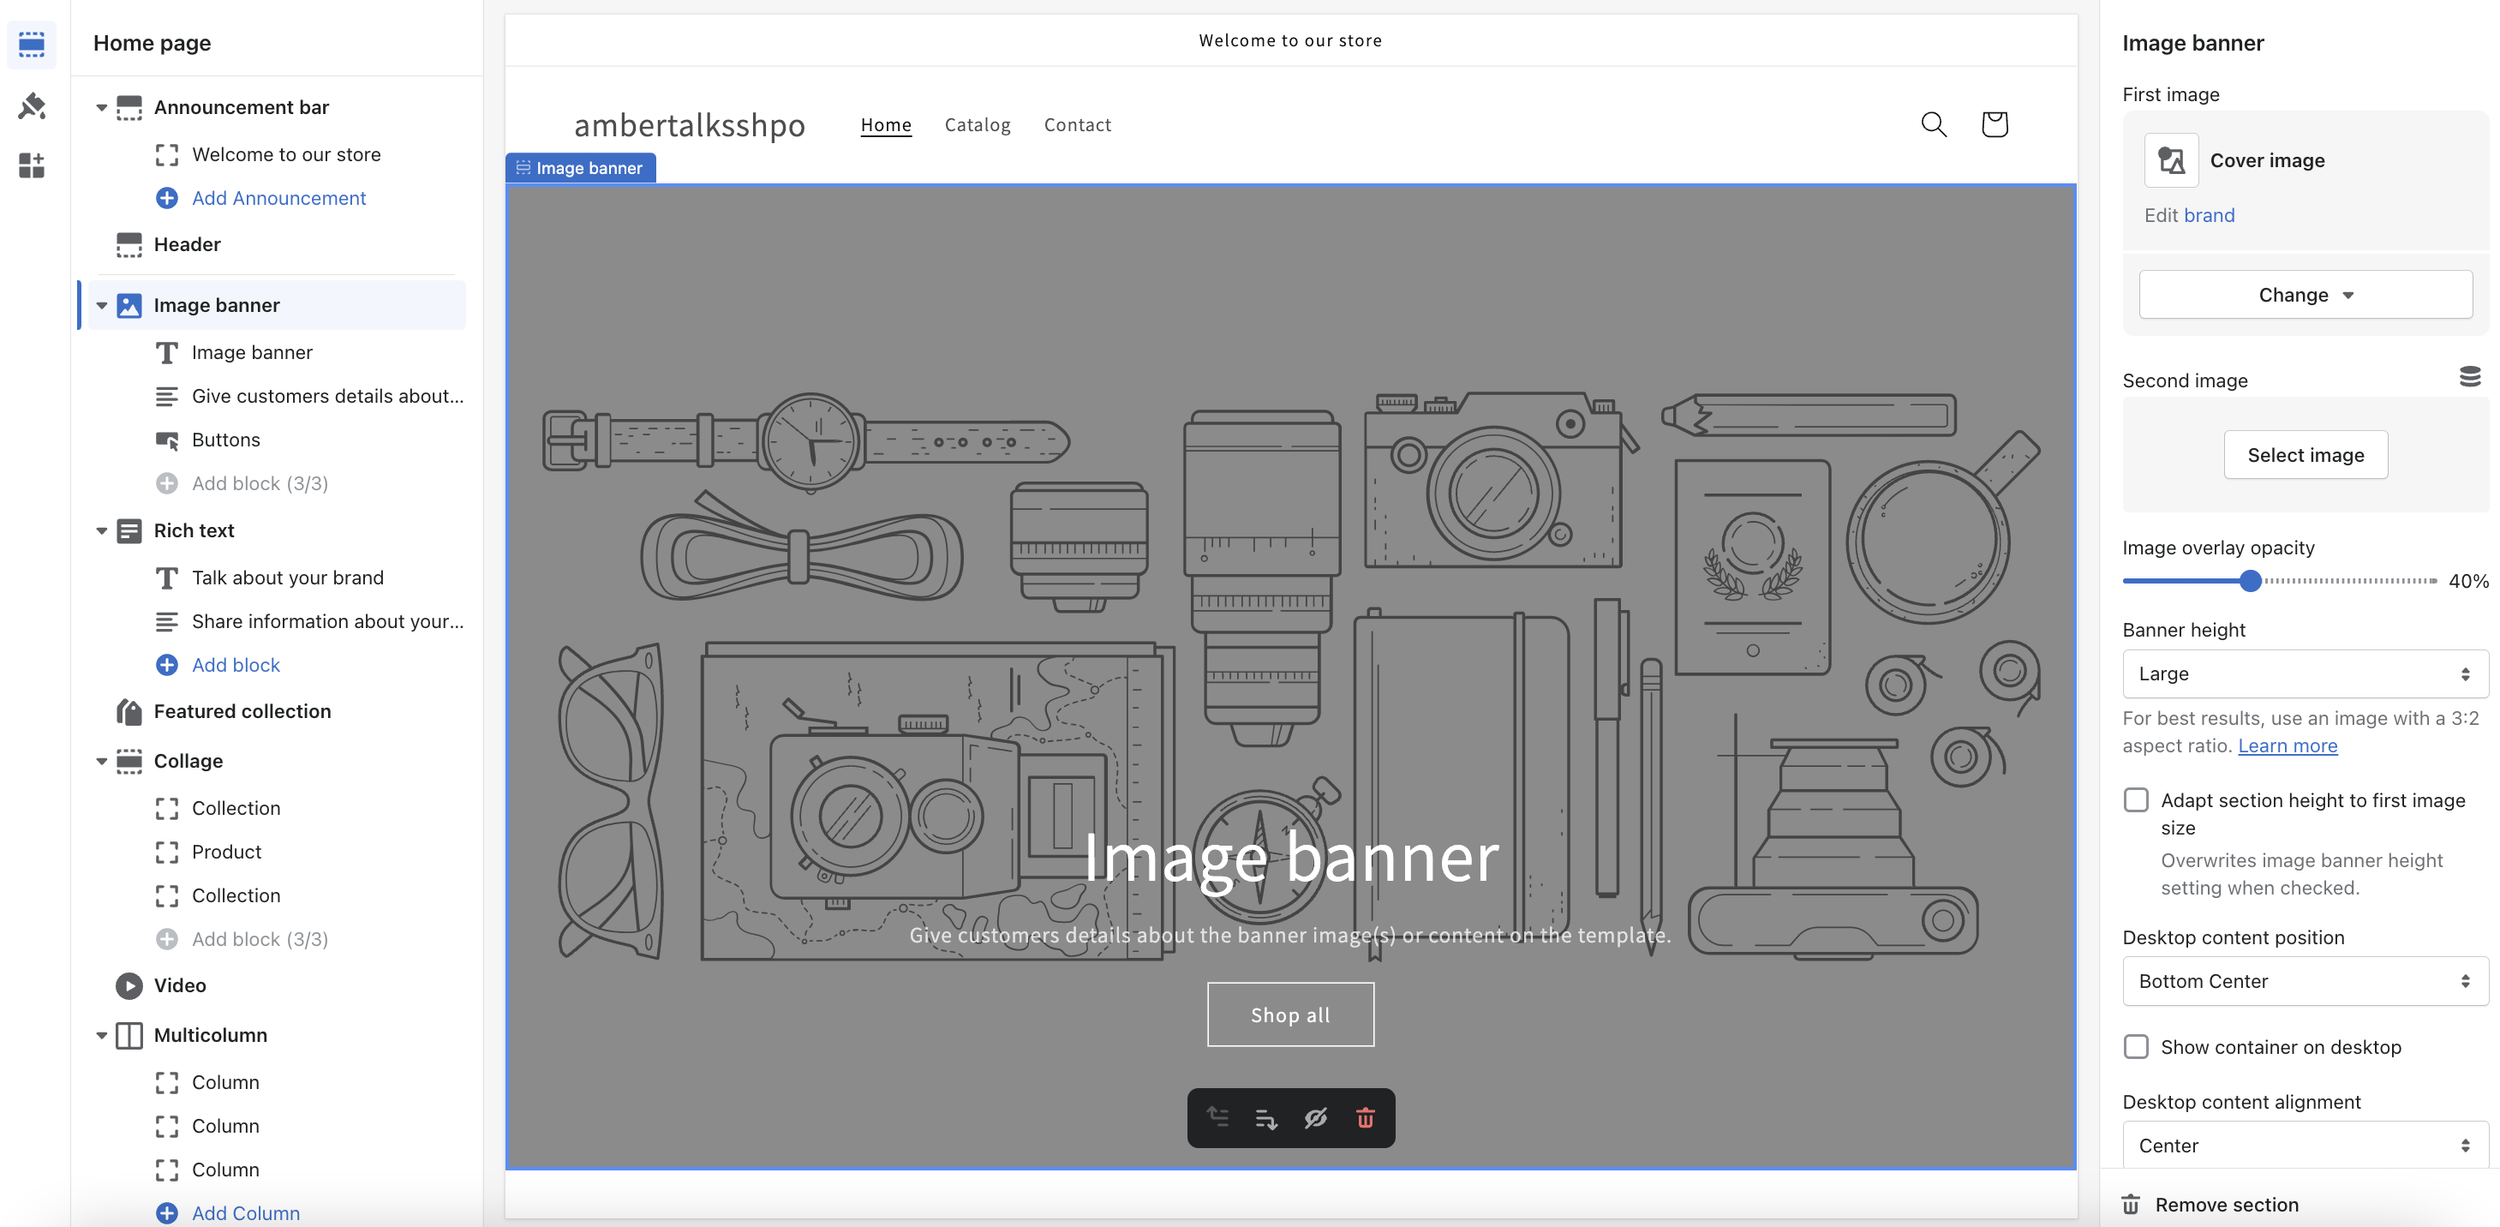
Below is the page that drops up after hitting the Customize Button.
Shopify tries to make it very easy to label every prompt. Click on everything (you won’t hurt it). Shopify will hover on each item, so you know what you are editing. Start at the top and work your way down. Whatever feature you don’t need you are able to “hide”. Hit the small eye button and it will hide a section.
Step 3: Connect a Domain
You have two options here “connect existing domain” to your store or purchase a domain right through Shopify. If you haven’t purchased your domain yet, I recommend purchasing it right through Shopify to make it easy. It will easily connect.
If you did purchase your domain through GoDaddy, BlueHost for example select “connect to existing domain” and follow the prompts to connect it to Shopify.
Step 4: Configure your sales channels
You can do as much or as little as you want at this point. But, if you plan to sell via social channels or are already doing so, add each social channel you’d like to sell through and follow the prompts. This makes keeping track of your sales SO easy. Every sale will now show up in your Shopify website and you can fulfill and work on them in one place.
Step 5: Set Up Shopify Payments
Next you will go in and activate Shopify payments. You also have the option to add in PayPal and Amazon pay. I recommend having these options for ease of sale. How many of us shop online at night for example while in bed? I know I am guilty of it! Many people have their credit card attached to PayPal, so they can complete the sale right then and there!
On the Home page, on the bottom left side corner you will see the “Settings” button. Click that and go through each prompt. There are many important tabs you can find under settings, “check out”, “taxes and duties”, “plan”, “store details”, and “policies” for example.
Step 6: Review Your Shipping Settings
Make Your First Sale!
Are you ready to hear that ka-Ching of your first sale? Most importantly you need to get eyes on your website, in order to make a sale. You have a few options, you can go the Paid Ad route - think, Google Ads, Facebook Ads, Pinterest Ads etc, or take advantage of all of the free options to begin with - posting on social media, email marketing, joining Facebook groups.
You’ve got this, my friend!
Now, if you’ve got any questions, I’d love to hear from you, comment below or reach out!! xx Amber
FREE PDF…. etc below

